この記事のサンプルは、このページのみcssを反映させてますので、https://暮らしのハンドノート.comからダイレクトにアクセスされた方にはサンプル画像が表示されません。
サンプル画像が見えない時は、ここをクリックして下さい。
プラグインのcssやTwenty Seventeenの追加cssを使うと全体的にcssが反映してしまいますね。
一部の記事にcssを反映させたい時は、カスタムフィールドにcssを記述しましょう。
カスタムフィールドの作成方法は、WordPressのカスタムフィールドを使用し投稿する方法
で説明していますので参考にして下さい。
※box名が重複した場合はbox名のみ重複しないbox名を使って下さい。
シンプルな囲い枠
↓htmlのコードは下記の通り↓
<div class="box10">BOXの中に入れる文字</div>
box10を使用したい任意のbox名(数値)に変更するだけです。
可愛くてシンプルなボーダー線
このサンプルはborder: soid (直線)を使っています。
詳細はbox10の中に記述しています。
.box10 {

position: relative;/*相対位置*/

width: 250px;/*横幅*/

margin: 2em 0 2em 0px;/*領域間(枠の外)のスペース */

background: #fff6f5;/*背景色*/

box-shadow: 0px 0px 0px 10px #fff6f5;/*線の外側*/

border: solid 3px #ff7c5c;/*直線 太さ 色*/

padding: 1.0em ;/*領域(枠)内のスペース*/

font-weight: bold;/*枠内の文字を太字*/

color: #ff7c5c; /*枠内の文字色*/

font-size: 2em;/*フォントサイズ*/

text-align: center/*枠内の文字を中央表示*/

}.box20 {
position: relative;
width: 250px;/*横幅*/
margin: 2em 0 2em 0px;
background: #fff9f1;
box-shadow: 0px 0px 0px 10px #fff9f1;/*線の外側*/
border: solid 3px #fbb305;/*直線*/
padding: 1.0em ;
font-weight: bold;/*太字*/
color: #fbb305; /*文字色*/
font-size: 2em;/*フォントサイズ*/
text-align: center
}.box30 {
position: relative;
width: 250px;/*横幅*/
margin: 2em 0 2em 0px;
background: #efefff;
box-shadow: 0px 0px 0px 10px #efefff;/*線の外側*/
border: solid 3px #1765c5;;/*直線*/
padding: 1.0em ;
font-weight: bold;/*太字*/
color: #1765c5; /*文字色*/
font-size: 2em;/*フォントサイズ*/
text-align: center
}
立体的に窪んだ線
.box11 {

position: relative;

width: 250px;/*横幅*/

margin: 2em 0 2em 0px;

background: #fff6f5;

box-shadow: 0px 0px 0px 10px #fff6f5;/*線の外側*/

outline: groove 5px #ff7c5c;/*立体的に窪んだ線*/

padding: 1.0em ;

font-weight: bold;/*太字*/

color: #ff7c5c; /*文字色*/

font-size: 2em;/*フォントサイズ*/

text-align: center

}.box21 {
position: relative;
width: 250px;/*横幅*/
margin: 2em 0 2em 0px;
background: #fff9f1;
box-shadow: 0px 0px 0px 10px #fff9f1;/*線の外側*/
outline: groove 5px #fbb305;/*立体的に窪んだ線*/
padding: 1.0em ;
font-weight: bold;/*太字*/
color: #fbb305; /*文字色*/
font-size: 2em;/*フォントサイズ*/
text-align: center
}.box31 {
position: relative;
width: 250px;/*横幅*/
margin: 2em 0 2em 0px;
background: #efefff;
box-shadow: 0px 0px 0px 10px #efefff;/*線の外側*/
outline: groove 5px #1765c5;/*立体的に窪んだ線*/
padding: 1.0em ;
font-weight: bold;/*太字*/
color: #1765c5; /*文字色*/
font-size: 2em;/*フォントサイズ*/
text-align: center
}
立体的に隆起した線
.box12 {

position: relative;

width: 250px;/*横幅*/

margin: 2em 0 2em 0px;

background: #fdf5e6;

box-shadow: 0px 0px 0px 10px #fdf5e6;/*線の外側*/

outline: ridge 5px #ff7c5c;/*立体的に隆起した線*/

padding: 1.0em ;

font-weight: bold;/*太字*/

color: #ff7c5c; /*文字色*/

font-size: 2em;/*フォントサイズ*/

text-align: center

}.box22 {
position: relative;
width: 250px;/*横幅*/
padding: 1.0em ;
width: 250px;/*横幅*/
margin: 2em 0 2em 0px;
background: #fff9f1;
box-shadow: 0px 0px 0px 10px #fff9f1;/*線の外側*/
outline: ridge 5px #fbb305;/*立体的に隆起した線*/
font-weight: bold;/*太字*/
color: #fbb305; /*文字色*/
font-size: 2em;/*フォントサイズ*/
text-align: center
}.box32 {
position: relative;
width: 250px;/*横幅*/
padding: 1.0em ;
width: 250px;/*横幅*/
margin: 2em 0 2em 0px;
background: #efefff;
box-shadow: 0px 0px 0px 10px #efefff;/*線の外側*/
outline: ridge 5px #1765c5;/*立体的に隆起した線*/
font-weight: bold;/*太字*/
color: #1765c5; /*文字色*/
font-size: 2em;/*フォントサイズ*/
text-align: center
}
角を丸くした線
.box13 {

position: relative;

width: 250px;/*横幅*/

margin: 2em 0 2em 0px;

background: #fff6f5;

box-shadow: 0px 0px 0px 10px #fff6f5;/*線の外側*/

border: solid 3px #ff7c5c;/*1本線*/

border-radius: 9px;

padding: 1.0em ;

font-weight: bold;/*太字*/

color: #ff7c5c; /*文字色*/

font-size: 2em;/*フォントサイズ*/

text-align: center

}.box23 {
position: relative;
width: 250px;/*横幅*/
margin: 2em 0 2em 0px;
background: #fff9f1;
box-shadow: 0px 0px 0px 10px #fff9f1;/*線の外側*/
border: solid 3px #fbb305;/*1本線*/
border-radius: 9px;
padding: 1.0em ;
font-weight: bold;/*太字*/
color: #fbb305; /*文字色*/
font-size: 2em;/*フォントサイズ*/
text-align: center
}.box33 {
position: relative;
width: 250px;/*横幅*/
margin: 2em 0 2em 0px;
background: #efefff;
box-shadow: 0px 0px 0px 10px #efefff;/*線の外側*/
border: solid 3px #1765c5;/*1本線*/
border-radius: 9px;
padding: 1.0em ;
font-weight: bold;/*太字*/
color: #1765c5; /*文字色*/
font-size: 2em;/*フォントサイズ*/
text-align: center
}
角を丸くした破線
.box14 {

position: relative;

width: 250px;/*横幅*/

margin: 2em 0 2em 0px;

background: #fff6f5;

box-shadow: 0px 0px 0px 10px #fff6f5;/*線の外側*/

border: dashed 3px #ff7c5c;/*破線*/

border-radius: 9px;

padding: 1.0em ;

font-weight: bold;/*太字*/

color: #ff7c5c; /*文字色*/

font-size: 2em;/*フォントサイズ*/

text-align: center

}.box24 {
position: relative;
width: 250px;/*横幅*/
margin: 2em 0 2em 0px;
background: #fff9f1;
box-shadow: 0px 0px 0px 10px #fff9f1;/*線の外側*/
border: dashed 3px #fbb305;/*破線*/
border-radius: 9px;
padding: 1.0em ;
width: 250px;/*横幅*/
font-weight: bold;/*太字*/
color: #fbb305; /*文字色*/
font-size: 2em;/*フォントサイズ*/
text-align: center
}.box34 {
position: relative;
width: 250px;/*横幅*/
margin: 2em 0 2em 0px;
background: #efefff;
box-shadow: 0px 0px 0px 10px #efefff;/*線の外側*/
border: dashed 3px #1765c5;/*破線*/
border-radius: 9px;
padding: 1.0em ;
width: 250px;/*横幅*/
font-weight: bold;/*太字*/
color: #1765c5; /*文字色*/
font-size: 2em;/*フォントサイズ*/
text-align: center
}
角を丸くした点線
.box15 {

position: relative;

width: 250px;/*横幅*/

margin: 2em 0 2em 0px;

background: #fff6f5;

box-shadow: 0px 0px 0px 10px #fff6f5;/*線の外側*/

border: dotted 3px #ff7c5c;/*点線*/

border-radius: 9px;

padding: 1.0em ;

font-weight: bold;/*太字*/

color: #ff7c5c; /*文字色*/

font-size: 2em;/*フォントサイズ*/

text-align: center

}.box25 {
position: relative;
width: 250px;/*横幅*/
margin: 2em 0 2em 0px;
background: #fff9f1;
box-shadow: 0px 0px 0px 10px #fff9f1;/*線の外側*/
border: dotted 3px #fbb305;;/*点線*/
border-radius: 9px;
padding: 1.0em ;
font-weight: bold;/*太字*/
color: #fbb305; /*文字色*/
font-size: 2em;/*フォントサイズ*/
text-align: center
}.box35 {
position: relative;
width: 250px;/*横幅*/
margin: 2em 0 2em 0px;
background: #efefff;
box-shadow: 0px 0px 0px 10px #efefff;/*線の外側*/
border: dotted 3px #1765c5;;/*点線*/
border-radius: 9px;
padding: 1.0em ;
font-weight: bold;/*太字*/
color: #1765c5; /*文字色*/
font-size: 2em;/*フォントサイズ*/
text-align: center
}
角が変形した不思議な線
.box16 {

position: relative;

width: 250px;/*横幅*/

margin: 2em 0 2em 0px;

background: #fff6f5;

box-shadow: 0px 0px 0px 5px #fff6f5;/*線の外側*/

border: solid 5px  #ff7c5c;/*1本線*/

border-radius: 300px 50px;

padding: 1.0em ;

width: 250px;/*横幅*/

font-weight: bold;/*太字*/

color: #ff7c5c; /*文字色*/

font-size: 2em;/*フォントサイズ*/

text-align: center

}.box26 {
position: relative;
width: 250px;/*横幅*/
margin: 2em 0 2em 0px;
background: #fff9f1;
box-shadow: 0px 0px 0px 5px #fff9f1;/*線の外側*/
border: solid 5px #fbb305;/*1本線*/
border-radius: 200px 100px 100px 200px;
padding: 1.0em ;
width: 250px;/*横幅*/
font-weight: bold;/*太字*/
color: #fbb305; /*文字色*/
font-size: 2em;/*フォントサイズ*/
text-align: center
}.box36 {
position: relative;
width: 250px;/*横幅*/
margin: 2em 0 2em 0px;
background: #efefff;
box-shadow: 0px 0px 0px 5px #efefff;/*線の外側*/
border: solid 5px #1765c5;/*1本線*/
border-radius: 100px 500px;
padding: 1.0em ;
width: 250px;/*横幅*/
font-weight: bold;/*太字*/
color: #1765c5; /*文字色*/
font-size: 2em;/*フォントサイズ*/
text-align: center
}
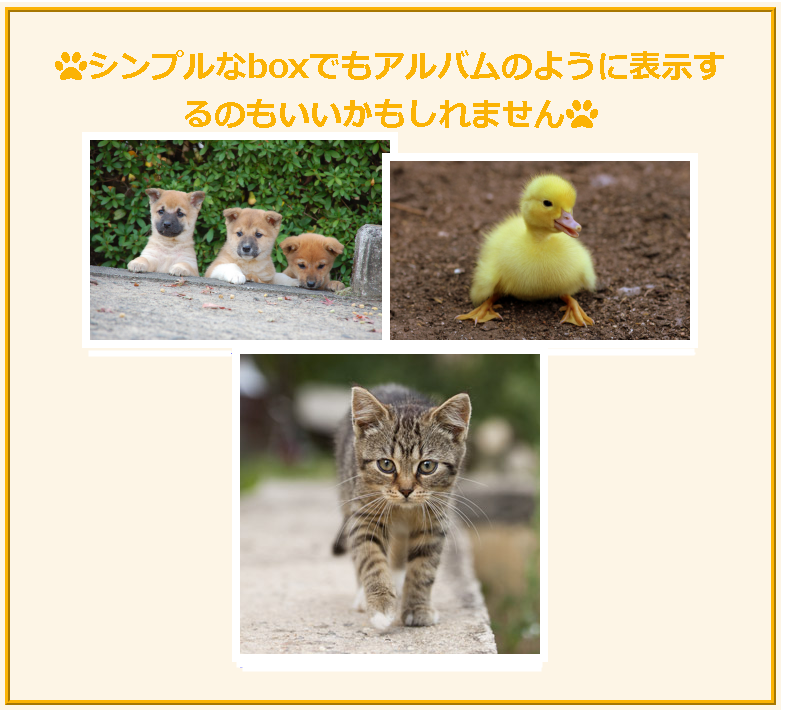
こんな使い方もできるよ!
アルバムみたいに
width(幅)の指定を外せば画面いっぱいに
例えば、下のboxのようにアルバム代わりにもアレンジできます
<div class="box3"><i class="fas fa-paw"></i>可愛い動物<i class="fas fa-paw"></i>
<a href="https://~画像のurl~画像のurl~画像のurl</a></div>
.box3 {
    position: relative;
    margin: 2em 0 2em 0px;
    background: #fdf5e6;
    box-shadow: 0px 0px 0px 10px #fdf5e6;/*線の外側*/
    outline: ridge 5px #fbb305;/*立体的に隆起した線*/
   border-radius: 5px;
    padding: 1.0em ;
    font-weight: bold;/*太字*/
    color: #fbb305; /*文字色*/
    font-size: 2em;/*フォントサイズ*/
    text-align: center
}
このFontAwesomeのアイコンを使うには少しだけ準備する必要があります。
まず、下のコードをコピーして
<link href="https://use.fontawesome.com/releases/v5.0.6/css/all.css" rel="stylesheet">
WordPressの[ダッシュボード]⇒[外観]⇒[テーマの編集]⇒右側のバーの[header.php]の<head>〜</head>の中に貼り付けます。
枠を横に並べる
枠を横に並べる時は幅や高さを指定できるdisplay: inline-block;を使います。
<div class="box13-1">box13-1</div>
<div class="box23-1">box23-1</div>
<div class="box33-1">box33-1</div>
.box13-1 {
    display:inline-block;
    position: relative;
    width: 200px;/*横幅*/
    margin: 2em 0.2em 2em 0px;
    background: #fff6f5;
    box-shadow: 0px 0px 0px 10px #fff6f5;/*線の外側*/
    border: solid 3px #ff7c5c;/*1本線*/
    border-radius: 9px;
    padding: 1.0em;
    font-weight: bold;/*太字*/
    color: #ff7c5c; /*文字色*/
    font-size: 2em;/*フォントサイズ*/
    text-align: center
}

.box23-1 {
    display:inline-block;
    position: relative;
    width: 200px;/*横幅*/
    margin: 2em 0.2em 2em 0px;
    background: #fff9f1;
    box-shadow: 0px 0px 0px 10px #fff9f1;/*線の外側*/
    border: solid 3px #fbb305;/*1本線*/
    border-radius: 9px;
    padding: 1.0em;
    font-weight: bold;/*太字*/
    color: #fbb305; /*文字色*/
    font-size: 2em;/*フォントサイズ*/
    text-align: center
}

.box33-1 {
    display:inline-block;
    position: relative;
    width: 200px;/*横幅*/
    margin: 2em 0.2em 2em 0px;
    background: #efefff;
    box-shadow: 0px 0px 0px 10px #efefff;/*線の外側*/
    border: solid 3px #1765c5;/*1本線*/
    border-radius: 9px;
    padding: 1.0em ;
    font-weight: bold;/*太字*/
    color: #1765c5; /*文字色*/
    font-size: 2em;/*フォントサイズ*/
    text-align: center
}
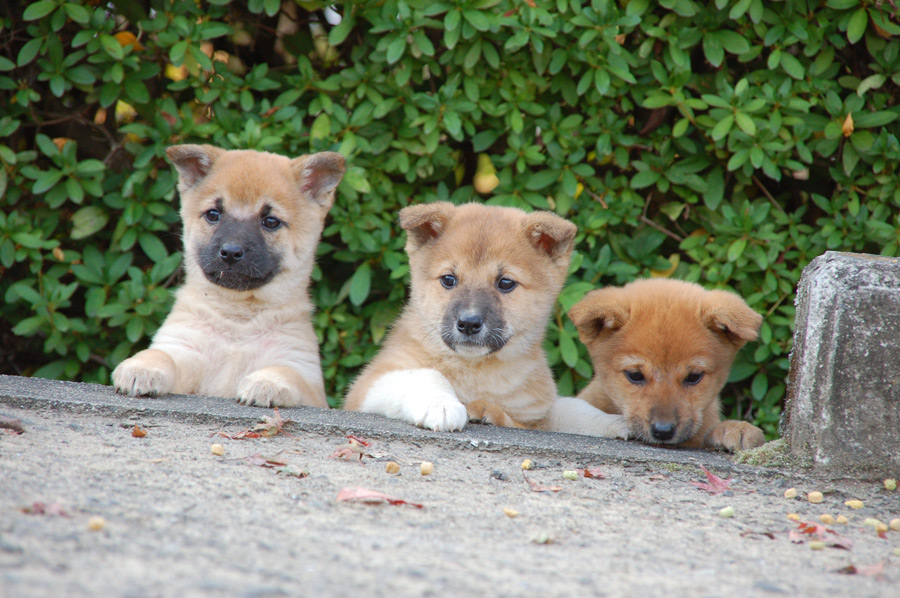
画像と吹き出し枠を横に並べる
画像と枠や文字などを横に並べるにはalign属性を使います。
画像に記述する時は下コードを参考にして下さい。
残念ながら、スマホの画面には入りきれないので吹き出し枠が画像の下に表示されますが・・・
回り込みを指定して表示しています。
可愛い3匹のワンちゃんですね。
<img src="URL(画像のアドレス)" align="leftまたはright">
今回の表示は
<img src="URL(画像のアドレス)" align="left></a>
<div class="hukidashi">ここは吹き出しの中の文字</div>
/*吹き出し*/
.hukidashi {
 	position: relative;
	display: inline-block;
 	margin: 1.5em 0 1.5em 0px;
	padding: 1.0em 1.0em;
	min-width: 2.0em;
 	max-width: 100%;
 	color: #000;
	font-size: 18px;
	background: #fff;
 	border: solid 3px #808080;
    border-radius: 10px;
 	box-sizing: border-box;
}

.hukidashi:before{
	content: "";
	position: absolute;
	top: 50%;
	left: -20px;
 	margin-top: -10px;
	border: 10px solid transparent;
	border-right: 10px solid #FFF;
 	z-index: 2;
}

.hukidashi:after{
	content: "";
	position: absolute;
	top: 50%;
	left: -28px;
 	margin-top: -14px;
	border: 14px solid transparent;
	border-right: 14px solid #808080;
 	z-index: 1;
}
↓解除するときは↓
<br clear="left">
<br clear="right">
<br clear="all">
left、right、allのいずれかを指定。
画像が左側にあるときの回り込み解除は、値にleftを指定します。
画像が右側にあるときの回り込みを解除は、値にrightを指定します。
画像が左右のどちらにあっても、値にallを指定すれば回りこみを解除できます
wordpressで<br>タグを使って解除できないときは、
<div style="clear: both;"></div>
を使います。
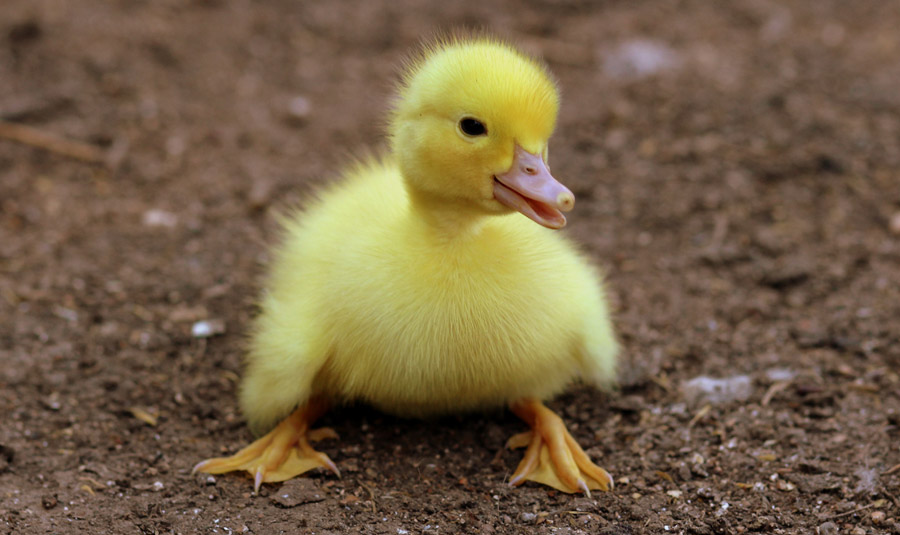
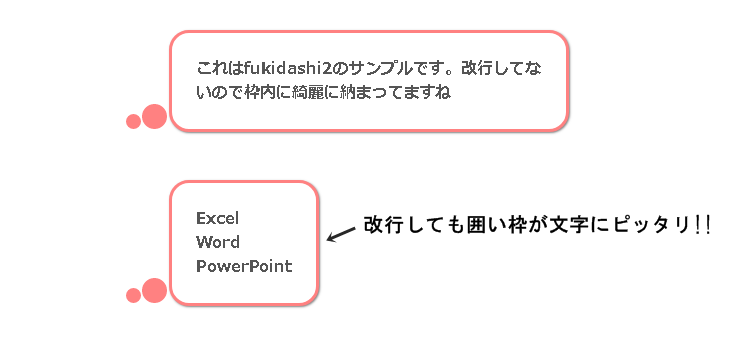
border-radiusを使って●を作って少し可愛げに
右下には少し影を付けて立体感をだしてアレンジしてみました。
こちら表示は左marginを330pxで指定して表示しています。
アヒルの赤ちゃんですね。
<img src="URL(画像のアドレス)" align="left></a>
<p class="fukidashi1">ヨチヨチと歩く姿がかわいい!
アヒルの赤ちゃんですね。</p>
.fukidashi1 {
    position: relative;
    display: inline-blok;
    margin: 1.5em 0 1.5em 330px;
	padding: 1.0em 1.0em;
    min-width: 250px;
    max-width: 300px;
    color: #555;
	font-size: 18px;
	background: #fff;
 	border: solid 3px #ff8181;
    border-radius: 20px;
	box-shadow: 1px 1px 2px gray;
}
.fukidashi1:before{
    content: "";
    position: absolute;
    background: #ff8181;
    width: 25px;
    height: 25px;
    left: -30px;
	bottom: 0px;
    coler:#ff8181;
    border-radius: 50%;
}
.fukidashi1:after{
	content: "";
	position: absolute;
    background: #ff8181;
    width: 15px;
    height: 15px;
    left: -46px;
	bottom: 0px;
    coler:#ff8181;
    border-radius: 50%;
}
![]()
![]()

コメント